← All Integration GuidesSTORE PLUGIN · ON-SITE + HPPAccept Crypto Payments with Magento 1 / OpenMage
Magento CE 1.9.3.0–1.9.4.5 and compatible OpenMage 19/20. Download the independent ZIP for this exact branch; its English instructions and PHP table are included.
Configuration illustration · verify your own store checkout and callback before live use.
Choose the correct package and PHP environment
Magento CE 1.9.3.0-1.9.4.5; OpenMage 19/20 native M1 API
| Shopping platform | PHP environment for this package |
|---|
| Magento CE 1.9.3.x | 5.6 |
|---|
| Magento CE 1.9.4.x | 5.6 or 7.2, with the applicable PHP/security patches |
|---|
| OpenMage 19 / older 20 releases | Use the exact release's PHP requirements, within 5.6-8.4 |
|---|
| OpenMage 20.14+ | 8.1-8.4; upstream notes possible warnings on 8.4 |
|---|
Use the PHP version permitted by both this package and your exact core release. A plugin does not make an older store core compatible with newer PHP.
01 · Prepare your MochiPay account
- Create an account and activate a subscription.
- Open Wallets, choose Add HD Wallet → Generate New, securely back up the recovery phrase and save the wallet. Enable the asset/network you will use for the test.
- Set a recognizable customer-facing Display Name in Profile.
- Open API Credentials and copy your API key and saved API secret. If no secret is saved, regenerate it for first-time setup and store it securely. Regenerating an existing secret invalidates integrations that use the previous secret.
Ready when: your subscription and receiving wallet are active, and you have the credentials needed below.
See the illustrated account setup →03 · On-site or HPP
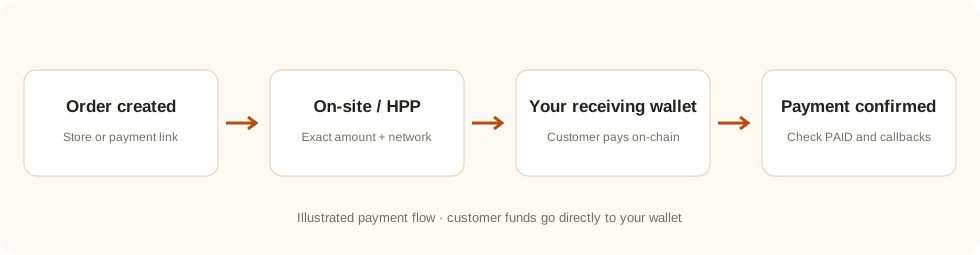
On-site (default): customers see the payment address, exact amount, network and QR code on the store domain. Platforms using a redirect-based gateway open a merchant-local payment page with the dialog.
HPP: change Payment Interface to HPP to redirect the payer to the MochiPay hosted payment page.
04 · Pay and verify a small order
- Place a small order and select an enabled asset/network at checkout.
- On-site opens the store dialog; HPP opens MochiPay. Check the order amount/currency, exact crypto amount, network and receiving address.
- Send the exact amount shown. The address QR does not include the amount; do not round it or reuse another order's address.
- Wait for chain confirmations. Check PAID in MochiPay and the corresponding store paid state.
A browser return, QR scan or screenshot is not proof of payment. The plugin re-queries the API and validates the order before updating it. Underpayment, overpayment, cancellation and expiration do not automatically complete the store order.
05 · Receipt and upgrades
Match the receiving address and transaction with the order and receiving wallet. Funds go to your wallet; there is no pooled platform payout balance.
Update files in place, preserve your saved settings and historical order mappings, then clear platform caches. Do not uninstall the module as an upgrade step. If creation times out, review or query the existing attempt before paying again.
Understand your payments and wallet →If the test does not complete
The payment option or order cannot be created
Check subscription status, an active receiving wallet, payment method code, credentials and the exchange-rate pair for the order currency. For plugins, also check the method is enabled for the store scope/customer used in the test.
The payment is still waiting or underpaid
Compare the asset, network, address and exact payable amount with the transaction. Wait for required confirmations. Do not mark a store order paid based only on a screenshot or browser return.
MochiPay is paid but my store/application is not updated
Check that notify/callback endpoints are publicly reachable over HTTPS and not blocked by authentication or a firewall. Confirm the integration can query MochiPay and inspect its error logs. Payment links alone update MochiPay, not an external store.